So I spent my first free weekend in about 5 months (two jobs kept me working 7 days a week) in part at the gym, in part doing fun stuff with my wife and in part assembling my new Harbinger of Menoth Model.
The Harbinger is a teenage girl who has been filled with the power of menoth and now is a warcaster (central leader figure) for the Protectorate of Menoth faction in Warmachine. Thanks to this power she doesn't touch the 'unclean' ground and floats about under tether from loyal acolytes.
What this means in model terms is that she is a really intricate and challenging model to assemble.
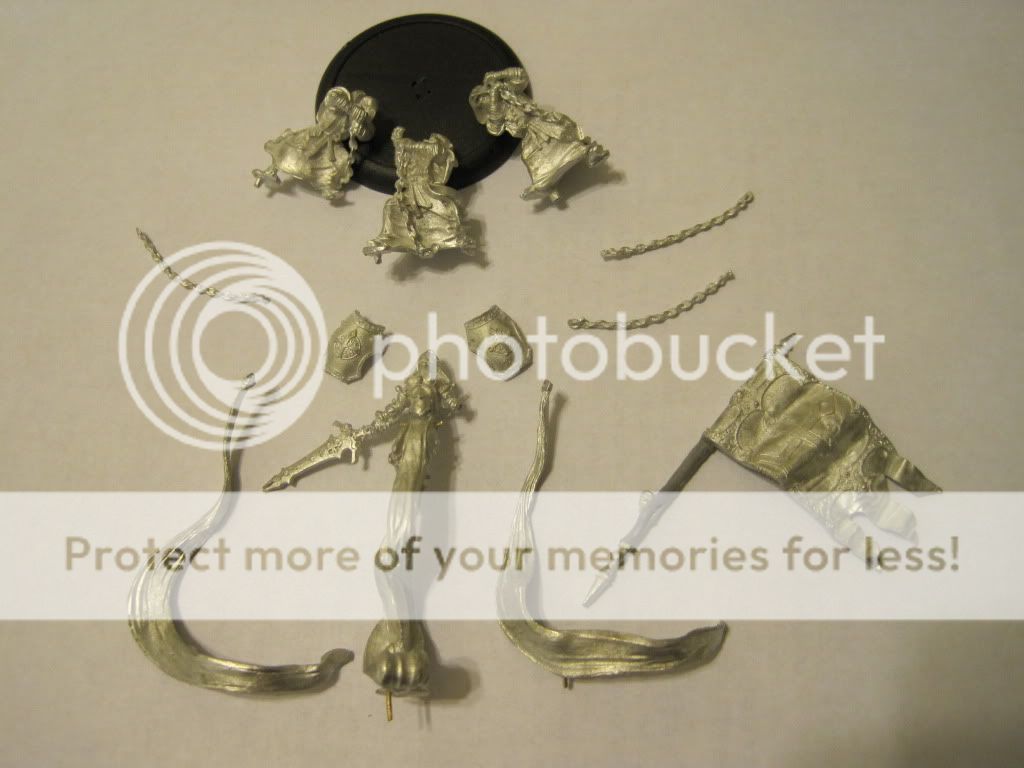 Here you can see the parts of the model. The only assembly in this picture is that her upper torso and lower torso/robes have been glued together. Essentially the model will have to be made in four stages once painted. Torso and robe swirls glued to base, Acolytes glued to base, chains glued between acolytes and Harbinger, spear/flag glued to Harbinger.
 For the base, I'm planning on using Procreate putty to model on some flagstones or the like. This will give it a good look but also let me add an extra binding agent to the small glue points that hold this tall, narrow model down. This will be my first time making a scenic base.
The model is also my first time in pinning a model that really needs it. I've done one set of pinning for a Ramshackle resin model but that was mostly so I didn't have to hold it while the epoxy set. This model will really need it to stay stable and not break on the tabletop.
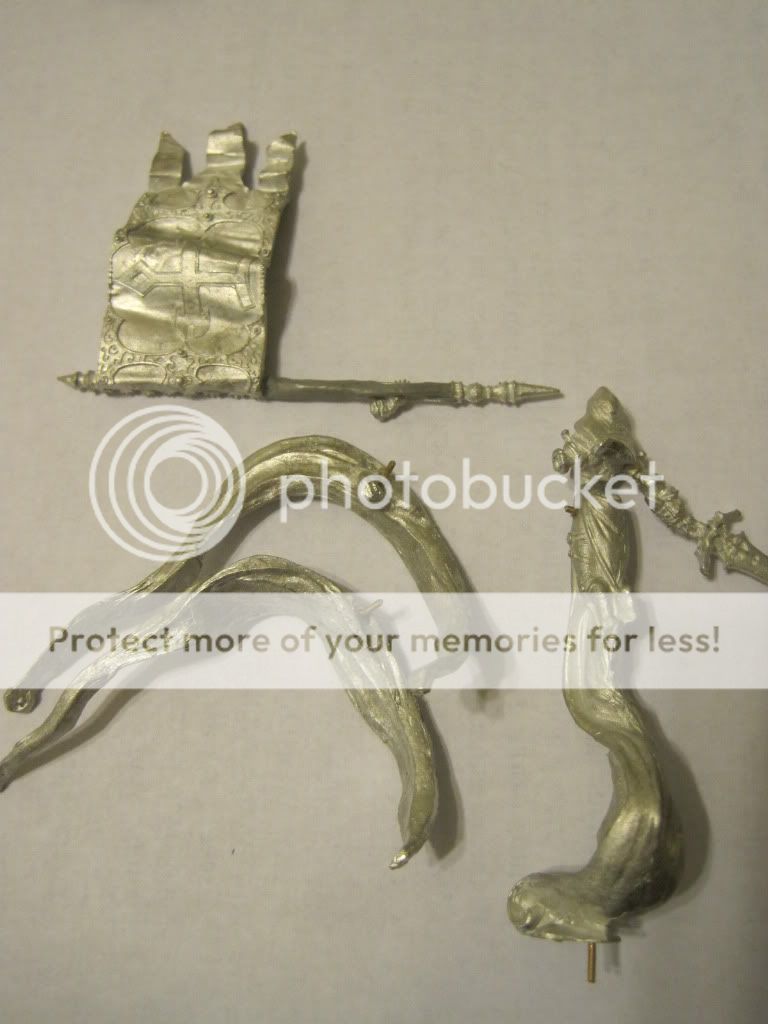 So this picture shows the pinning I've done so far. The torso pieces have a pin, glue and some procreate in them to cover up the bond. I have drilled two holes in the Harbinger's robe base but only one has a pin in so far. She also has a pin in each hip to hold the small pieces at the top of her swirling robes and each robe has a pin at the bottom to attach to the base. The spear has a length of rod added but more on that later.
 This is what she looks like propped up now. I'll have to hold her here while I mark out the position of the acolytes so I can drill the holes for them in the base and plan out where the putty work will go. You can see already that the base is pretty crowded. I kinda wish Warmachine used 60mm bases for models like this.
 So here is the flag/spear. This will join to the model by her wrist and by a small nubbin the back of the shaft that pressed into a dip on the back of her hood. In itself it is a very inventive way to secure the piece but the thin, flat shaft is far too flimsy in my view to hold up the weight. I drilled a hole in the base of the flag and glued brass rod from there down the shaft. Near her hand, I bent the rod so that it went up and over, like a handguard, and glued it down. To clean it all up, I used some procreate putty to smooth things out. Hopefully with some filing if need be and good painting it won't be noticeable. I would strongly reccomend doing this or reinforcing some other way because of the weight and small contact points for this part.
Well that's as far as I've got for now. Next on the list is to mock up the acolytes so I can drill out the base ready for their pins. I'll also mark out everything on the base so that I can start puttying up things to look a bit more exciting. Once I glue them in with their pins going through, I'm planning to block off the entire underside of the base with procreate so that the pins are well and truly locked in place and won't break off.
Painting will have to be done in parts so after a wash and some priming we'll be on the way.
Stay tuned...
Pete
It's a great model, but looks like a real challenge to put together well, so congrats on what you've done so far. Looking forward to seeing the finished article.
ReplyDeleteThanks Sholto. I'm going to try and work on it tonight at least a little bit. It's fun to try something different at times. My GW plastics go together from start to finish in just a few minutes whereas this will take another half an hour to plan and drill for the acolytes, probably an hour for base sculpting and then another hour for assembly after the painting is complete.
ReplyDeleteThe real issue is going to be holding it in place neatly enough when I glue the Harbinger and robes down. There are 6 contact points (two pins in her base, one at the top and bottom of each robe) that I need to get to bind. Superglue will be best for getting the quick lock but I think I might have to go in after that with some putty and/or epoxy to secure the bond really well.
Now where did I put that leaflet on additional hand transplants.....?