Showing posts with label Battle Report. Show all posts

Wednesday, June 22, 2011

Everyone's a king when there's no-one left to pawn - sacrificing units

But what do you do if the only things to sacrifice are Astartes?


Hey everyone,

So the post title is a lyric by Razorlight but I had to think a bit about sacrificing units in my game tonight against Blood Angels. It was an interesting list the my opponent brought and I had to really make some tough calls about which units to keep and which to lose.

My Deathwing 1500pt list took on a Blood Angels army consisting of:
- Astorath the grim
- 5 jump pack Death company (DC) with Lemartes (uber chaplain). All with power weapons.
- 5 jump pack Death company, all with power weapons.
- 5 terminators with assault cannons
- 5 lightning claw terminators
- 5 tactical marines
- Death company dreadnought with Blood Talons

Now this isn't a very balanced 1500pt force but it sure packs a lot of punch if it gets the charge on you. Plus the death company get furious charge, feel no pain, rerolls to hit when charging and rerolls to wound (plus Astorath makes the opponent, i.e. me, re-roll successful invul. saves). Very nasty.

I quickly realised when my early shooting phases didn't kill off the jump troops that I would have to sacrifice units while the rest of my army moved to deal with the threats of charging Blood Angels. The death company with those characters hit so hard on the charge that you're pretty much bound to lose a lot of guys, or the whole unit if you lay with Deathwing five man squads.

Thankfully I spent a lot of time talking with Old Shatter Hands about the necessary sacrifice tactics he played with when using Tau and having to block the opponent's movement. The Kroot bubble wrap, Piranha blocking and accepting one charge in order to prevent multi-assaults etc. were all in my mind during this game. The harder part is that I had to accept the loss of ~250pt units as part of my sacrificial strategy.

As it played out, I whittled down my opponent's non-DC force with firepower and focused assaults while I fed in two units and the librarian to control the rampaging Death Company attack on my left flank. My army as a whole mopped up the entire BA force through careful shooting followed by concentrated assaults, then brought the weight of thunder hammers to bear on the rampaging Death Company and special characters. I had to use the assault rules to my advantage when I charged into the existing combat by making sure that I only made it into base contact with one or two DC marines and not the characters, meaning the new attackers could only be hit by a few shots each time. In the end it paid off and the Deathwing cleared the table, losing two entire squads, the librarian and a couple of terminators.

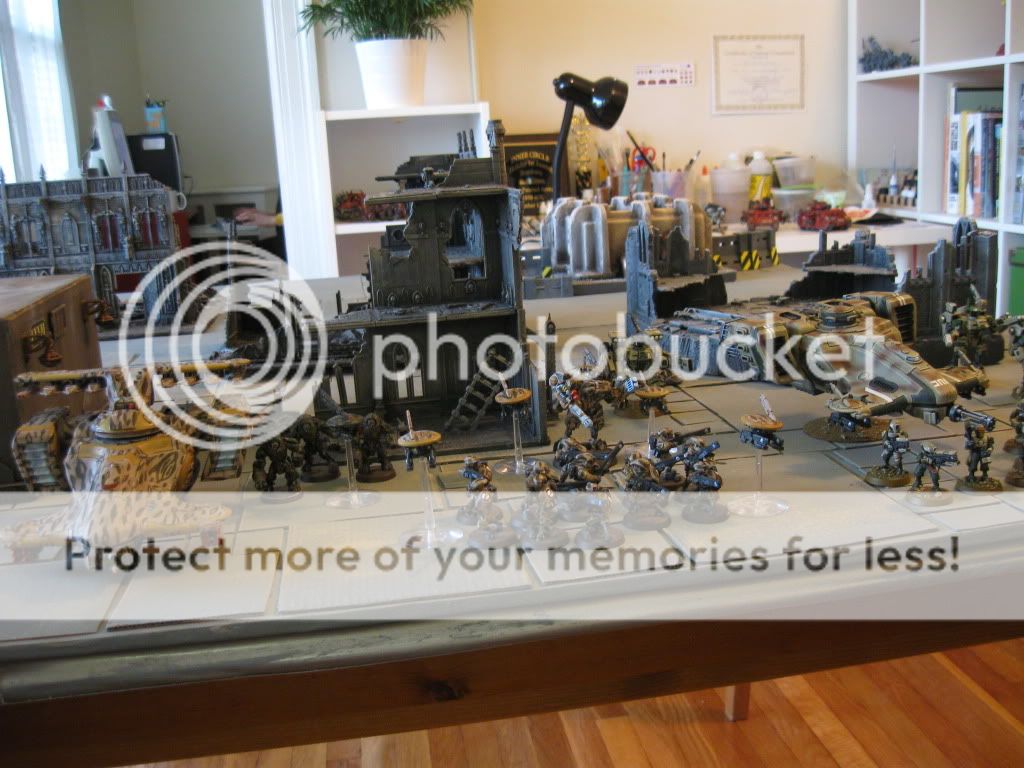
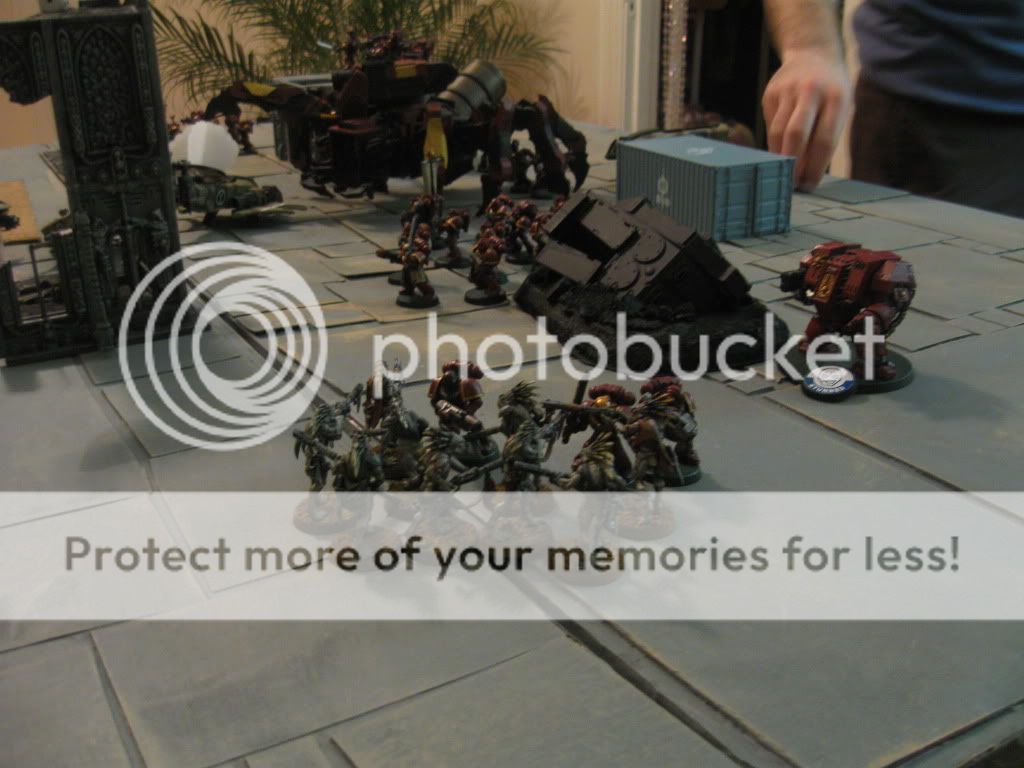
The victorious Deathwing posing on the GW gaming table.


Sacrificial tactics.


So here is my take on the steps of sacrificing units.

Do you need to sacrifice something?
If you don't need to have a unit die for a greater purpose, don't put it in a place where it can die. Simple really but something that people (me included) forget at times. You should sacrifice things when they will help your overall strategy, save a better/more important unit, tie up an opponent's powerful unit or act as bait that puts him in a vulnerable position. Otherwise, I would try to keep your toy soldiers alive as much as possible. They can't help you if they die for no reason after all.


Which unit will you sacrifice?
There are two main factors to consider when it comes to choosing who will die for your victory.
- The first one is who is close enough to get into the right position. Clearly if you have only one unit that can block your opponent, they are the ones with heads on the chopping block. The more your forces are set to work together and overlap, the more choice you will have about who to use for your sacrificial strategy.
- The second is to choose the unit you can most afford to lose. Most of the time you will go for your more basic choices over the expensive elites (choosing scouts over losing a squad of terminators) but remember what each unit is capable of. Assault terminators can kill like nobody's business but if you have scouts on the objective near the end of the game and a dreadnought coming to get them off it, the terminators are perfectly viable to give up in exchange for the win. In my case I gave up a ranged Deathwing unit led by the librarian in order to allow my thunder hammer squads to get the charge on the DC marines, giving them better odds to win.


What is the purpose of the sacrifice?

This one is the really key point that you need to keep in mind when considering your tactical options. You must have a good purpose for your unit or you will simply be throwing them away, which makes your models feel sad ;-)

You can sacrifice for a number of reasons including:
- Stalling your opponent e.g charging a dreadnought with a mob of fearless orks. Even without a power klaw, those orks will last a long time. They can't hurt the dread but they have taken it out of the game for a number of turns. Unless it's a Blood Talon dreadnought it probably won't kill that many orks per turn and will spend the game locked in a combat it doesn't want to be in. The Tau under OSH are masters at this as the Piranhas, drones and kroot all stall your opponent to give more time for the shooting elements to do their work.

- Blocking your opponent's movement. If you have a unit of Furious charge Blood Angel terminators in a land raider, you have a threat range of about 20" (12" move, 2" deployment, 6" assault). If I can move a unit in the way of the Land Raider you have to get past that first before getting into the assault you want to be in. Now I know that in this case my blocker would have to be a vehicle or the Land Raider could tank shock through, but the point stands. I've headed off a potential charge by Nobz with a couple of gun drones, letting me get the charge the next turn (plus another round of firing). Think about your opponent's likely avenues of movement when you start the game and plan on how to block them if you need to.

- Saving a more important unit from dying. Let's say I'm the one with a unit of Death Company led by a chaplain. If I get to assault, my damage output goes way up compared to if I am on the receiving end of an assault. In this case, I would happily sacrifice another unit to my opponent so that they are left close enough for me to get the charge on them (Note: This plays also into the bait tactic below). As mentioned before, you could also choose to save a scoring unit that is on an objective and might give up a very strong elite unit for this purpose. In the case of OSH's tau forces, he would give up a unit of 10 kroot (70pts) in order to save the squad of crisis suits (150+ pts) hiding behind them and let the army as a whole have more firing time. In my case, I let a character and a ranged unit take the killing charge of the enemy assault units in order that my counter-assault folks could return the favour.

- Baiting the enemy forces. Now this one is a tricky thing as it depends on your opponent wanting to kill your bait and expending effort doing so. The trick when baiting is to put your sacrificial unit in a position where your opponent can go for it, but will have to change his line of attack to do so. Putting a single dreadnought in line of sight of a broadside across the table is not bait most of the time, it's a target. Putting your expensive HQ unit (e.g. 3 Crisis suits + Commander) on one flank where your opponent can get to him if he just moves a couple of units is more like it. The idea with baiting is that you make his army start to act piecemeal, rather than as a whole. I will lose my bait, but you won't have the units that moved in position to deal with the rest of my army which is now moving to act on my plan. Of course, when doing this you should endeavour to use units and positioning that will be good even if the bait isn't taken. In my crisis suit example, if you ignore the suits, I'll be able to put a lot of fire on the flank of your force, which vehicles hate. Bell of lost souls did a good article with thoughts on baiting (http://www.belloflostsouls.net/2009/01/goatboys-40k-thoughts-for-week-baiting.html)


That's it from me for now. I'll probably post a little bit more this week but time is rapidly running out for me as I gear up to head off to a new country (Slovakia) and a new career (Teaching English). I fly out a week from now and it's both exciting and scary.

All the best

Pete


Wednesday, June 15, 2011

I hate it when people give up before they've lost.

My last opponent could take a lesson from this pooch.


Hey everyone,

So my Deathwing got to play in a 3k points game last night and it was mostly a lot of fun. I teamed up with the Tau player I played against last week to take on a guy with 3k of orks. It looked like it was going to be a really great scrap but sadly the ork opponent just started getting despondent and downhearted really early on in the game and it took me giving him tactical advice to get him to actually try and play again, which made the game drag a bit.

Essentially he was upset that our turn one and two shooting really smashed his ork forces and he didn't think he could get into assault with us. Instead of really making an effort to maximise his gameplay to at least do damage to us, even if he still lost, he seemed happier to mope about and just resign himself to saying that he brought the wrong army and that game wasn't really winnable.

Sigh.

My side was winning when we ran out of time (turn 4) in the overbooked GW gaming space but I'd almost got to the point when I was going to make him swap sides to take my Deathwing so I could unleash my inner ork and kick some ass ;-)

Battle Report


Army lists were (approximately as these are from memory)
- 1500 pts deathwing.
Belial, Librarian, Assault command squad (apoth, banner), 2 assault squads, 2 shooty squads)

- 1500 pts Tau
Farsight, bodyguard. 6 crisis suits (firestorm, BC&PR), 6 stealth suits, 48 fire warriors, 20 kroot, 8 pathfinders, 1 Piranha, 3 Broadsides, a bunch of drones, 2 devilfish

- 3000pts Orks
Ghazghull, PK warboss, 10 Lootas, 10 Burnas, 20 Nobz kitted out, 80 boyz, 2 trukks, battlewagon, killa kan, 8 warbikers, Looted wagon with boomgun.


Basically the battle was a turkey shoot in turn 1 (understandable) and for turn 2 my opponent liked my advice to use the devilfish and drones as blockers (thanks Old Shatter Hands) so we could funnel the orks towards us and slow them down. It was pretty successful and our opponent didn't really hit us with enough to truly cripple us though I think he could have killed off the Tau player's flank if we'd had time for another turn or two (and if he'd been playing them like orks....as I would have).

His key problem was letting our shooting dictate his plan and footslogging ineffectively. If you're coming at us on foot, you should be moving and running as far and fast as possible from turn 1. When your trukk with Ghazghull and nobz gets stunned on turn 1 (leaving it in LOS of the broadsides again), you get that power squad of nobz out and get running as far forward as you can. You get your units into assault with the maximum prejudice and using cover as much as you can. Your killa kan should move and run from turn 1 too. If he loses the klaw, he's still on assault duty for taking out vehicles or tying up battlesuits in assault.

He chose to shoot with his boys mobs a lot more often than I would. In my book Boyz get to shoot when they are about to charge into assault, or for a turn prior if they are shoota boyz. Nobz don't shoot as their firepower is nothing compared to their ruthlessly powerful assault abilities. When you stop your boyz mob from running in order to take 2 rokkit shots (BS2) at the front armour of a devilfish (12) you've not really grasped where ork power lies. Also, a S8 AP3 large blast weapon should be aimed at the tightly clustered crisis suits to kill them with instant death instead of the 12 fire warriors nearby, no matter how cool it looks to cover 12 models instead of 3 and 2 drones.

When I got him to use his forces in a more effective manner (multi-assaults, using Ghaz's waagh, killa kan vs devilfish etc) the battle really jumped back into contention from where he seemed happy to leave it in turn 2.

It was still a fun game to play and it would have been nice if we'd had time to bring the game through a full turn 4 (we cut it short) and played turns 5-7. I think the orks would have probably lost, but they could have ripped up the Tau flank and it would have been an effort for the Deathwing to bring them down finally.


So don't let me see any of you blog readers giving up on games that aren't going your way. My charge to you is to persevere until the end. It ain't over until the last dice is rolled!!!

Pete :-)

Wednesday, May 25, 2011

Tonight I can write.....of a Deathwing battle and some more poetry ;-)

So I took the Deathwing out to play tonight.

After carrying around a big box of models during my teaching course today, the stage was set for a Deathwing battle at the local GW in Cambridge. I got the impression fairly quickly that most people there were playing fairly unfocused lists so I was a bit worried I'd be seen as a power gamer, but I figured that the disparity in codex age between me and my opponent (Space Wolves) should even things out.

We played pitched battle annihilation and my army was simple.

Belial, Librarian, Command Assault squad (with apothecary), 2 assault squads, 2 shooty squads.

My opponent brought (roughly):
- Wolf Lord with wolf claw and storm bolter
- Rune priest (jaws and living lightning)
- 5 Wolf guard in terminator armour, 2 wolf claws, 2 power fists, 1 thunder hammer, assault cannon
- Venerable Dread (AC)
- 10 Grey hunters
- 15(?) Blood Claws led by a Wolf Guard w/ PF
- 5 Wolf Scouts (sniper rifles and missile)
- Vindicator
- 5 Long Fangs (Multi-melta, heavy bolter, plasma cannon, lascannon)


I knew from his armaments that he hadn't really put together the list for killiness, but figured it would be a good first game for the Deathwing anyway. I won the dice off and gave him first turn. He deployed fairly evenly with Grey Hunters and Long Fangs on one flank, Vindicator, WG and Lord in the centre, then Dread and Blood Claws with Rune priest on the other flank. He reserved the scouts for outflanking. This seemed a waste to me since they had heavy weapons but hey ho.

To counter this, I deployed one shooty squad with the Librarian on the flank table edge facing his Dread and Blood Claws. All other squads were deep striking.

His turn 1 had nothing much since he had no targets. He moved forwards with everything but left the vindicator sitting, now separated from his mini-deathstar of lord and WG. My turn 1 brought in Belial and the command squad, and another assault squad. Belial et al. set up in my opponent's rear corner with LOS to, but out of charge range of, the dread. The other squad landed between two buildings with LOS to the Vindicator's flank. A few missiles later and I'd stunned the dread and blown up the tank. My shooty squad also killed some Blood Claws.

Turn 2 he continues to move forward on his right flank, which seemed a waste since my entire force thus far was on his left. His Wolf Guard wheeled around to advance on my guys and the Blood Claws elected to shoot rather than charge Belial's squad. Terminator armour and FNP saved them and the Librarian stopped Jaws being cast. My turn 2 gave me the second shooty squad who I deepstruck in place to block and shoot the wolf guard. I once again stunned the dread and charged the Blood Claws with Belial's squad. He took two wounds and we lost one terminator, but stomped the Claws, making them run, only the WG and Priest still alive. I consolidated so that they would be within 6" and unable to rally next turn

Turn 3 puts his fleeing units almost off the table. He gets to charge the shooty squad with his Wolf Guard though and with some good shooting and wolf claws, pulls them apart before I could fight back. I get my last squad and strike them to the flank I'm rapidly taking. I stun the dread again (damnit, just die), move Belial to escort the fleeing models off the board and get my power hitters in position to counter assault the WG if they get into combat with the assault squad near them. The WG are very killy, but I've got a huge amount of hitting power on offer to overwhelm them if I concentrate it.

Turn 4 lets him just get the charge on one of my assault squads, but the lord and one WG aren't close enough to strike. I get some good rolls with my lightning claws and tear up three of his guys, then the hammers/fists come into play and we're reduced to the cyclone guy on my side, his lord and AC on his side. I then shoot the DCCW off his dread, letting me charge it and PF it to death then my command squad assaults in to kill the lord and remaining Wolf Guard, their 3+ Storm Shields (thanks FAQ) saving them from the wolf claws.

He has 1 kill point (shooty squad), and has killed 10 terminators. I have 6 kills points (7 if the WG leader of the Blood Claws count) and we call the game as it's getting late.


Now clearly my opponent made some major errors and didn't correct them later. The wolf scouts should have been on the table in turn 1 to use their guns, the devastators (whose loadout would benefit from less diversity) needed to be better placed from the start and, when it was clear I was hitting just one flank, should have been moved to counter on turn 1. Instead they holed up in a building with great LOS to my flank that had no models on it. The end result was that I took on around 1000pts of Wolves with my whole army and mashed them. Good opponent though and kept smiling through to the end. If we'd had time I'd have danced out of his range and kept throwing missiles at his remaining troops. Or if I decided to be more casual I would have footslogged over to his scouts, hunters and fangs who'd hunkered down in a few buildings and tried to fight them out, just for kicks.

The Deathwing are nice, no question, but very different to play with. You have to use deepstriking (with Deathwing Assault) in many cases because you can't risk a long range gunfight against most foes. With that in mind, I can see that picking the DS locations can make or break your game from the start. I think this army is going to be very tactical to play and a real challenge when facing a less casual player, or even one who realises I might DS and castles up. Deathwing also suffer a problem of cracking Mech, especially walkers. Against vehicles I have hammers, fists and some chainfists but I have to think twice when facing a Dread that can pulp me pretty badly.

Overall I had a blast playing my new army and the GW store here is really cool. The staff were excited about Finecast but didn't try to sell me anything and just loved to talk about the hobby. It made me feel like I was in the GW that I grew into the hobby with and not some of the more sales-focused ones I've been to recently.

Thanks for reading all.

To finish off we have poetry.....it's good for you


I think this is my favourite poem I've yet read. It was shown to me be someone who I was close with and resonated with me deeply then, and still does as I look back on things. I hope you enjoy the flow, words and emotions too.

I'll culture you gamers yet ;-)


Tonight I Can Write

Tonight I can write the saddest lines.

Write, for example, 'The night is starry
and the stars are blue and shiver in the distance.'

The night wind revolves in the sky and sings.

Tonight I can write the saddest lines.
I loved her, and sometimes she loved me too.

Through nights like this one I held her in my arms.
I kissed her again and again under the endless sky.

She loved me, sometimes I loved her too.
How could one not have loved her great still eyes.

Tonight I can write the saddest lines.
To think that I do not have her. To feel that I have lost her.

To hear the immense night, still more immense without her.
And the verse falls to the soul like dew to the pasture.

What does it matter that my love could not keep her.
The night is starry and she is not with me.

This is all. In the distance someone is singing. In the distance.
My soul is not satisfied that it has lost her.

My sight tries to find her as though to bring her closer.
My heart looks for her, and she is not with me.

The same night whitening the same trees.
We, of that time, are no longer the same.

I no longer love her, that's certain, but how I loved her.
My voice tried to find the wind to touch her hearing.

Another's. She will be another's. As she was before my kisses.
Her voice, her bright body. Her infinite eyes.

I no longer love her, that's certain, but maybe I love her.
Love is so short, forgetting is so long.

Because through nights like this one I held her in my arms
my soul is not satisfied that it has lost her.

Though this be the last pain that she makes me suffer
and these the last verses that I write for her.

Monday, March 21, 2011

Fail Gamers Birthday Bash Tournament over the weekend.

Good morning all.

So this past weekend I played in the Frederick All Inclusive League Gamers (FAIL Gamers) tournament for their second Birthday. The Fail Gamers have been a great place for me to meet good people, get in a bunch of games, enjoy the forums and have an all around good time with some wargaming. I haven't totally taken advantage of all they do (40k, WFB, Flames of War, Warmachine, Malifaux, Dystopian Wars, Dark Heresy and more) but I've still really enjoyed my time here.

So the tournament was primarily done for the club members as a thankyou for all the support and time they gave to make the club run as well as it did. To this end the club folks got a small advantage. Each player received a ticket for: Painted army, well-painted and based army, WYSIWYG, then one for each 3 months of club dues paid. You could redeem tickets for special wargear, battlefield conditions or unit rules, only once per game.

The rules were mostly balanced. I took one that let my deffkoptas call down a S6 AP3 ordnance blast that always scattered 2D6 and that was reasonable. Only one rule seemed truly broken to me and it was only broken for one army. Mow Em Down let a unit make normal ranged attacks when assaulted by a unit prior to assault instead of normal assault attacks. The guy with a Farsight bomb bought this for each of his games, making his unit nearly untouchable. Thankfully I didn't play him and so I was good overall.

My Games


Of three games I won 2 and lost 1. The first and third games were great fun (not just because I won) and game 2 was meh. I ran my 1850 ork list from the last tournament minus the grots and 20pts of wargear.

This photo says it all. 6 models survived the game....total!


Game 1
Drop pod and stormraven blood angels here. 5 objectives which we placed in the table centre, agreeing we'd prefer a punch up ;-) He got turn 1 and dropped down into my backfield with 2 Blood Talon Furioso's, then managed a turn 1 fleeting Death Company dread (also blood talons) into my ork boyz. The lootas were flamed out of cover and ran, one battlewagon was magna-grappled and shaken then the boys got hacked up by the DC dread (blood talons hurt!). In my turn I punched back with the nobz and deffkoptas, slaughtering marines left and right. It turned into a glorious brawl across the field where the power of diversified nobz prevailed over the power of blood angels who reroll everything (so it seemed). By the end of the game I held 4 objectives and contested the 5th. He had one drop pod and an immobilised Furioso on the table, phew. Great game and a friendly opponent.

Game 2
I knew this was going to go badly from the start. It was about surviving, with each unit over 50% strength gaining you 2 VPs, under 50% 1 VP and 0 for dead units. My opponent brought razor/dread/dakka pred/tempest speeder spam marines with MSU and a counter assault of 10 TH/SS terminators. He had 34 possible VPs vs my 22 possible, so I would have to kill 6.5 of his units with no losses just to draw. The deployment rules let you go anywhere on the table more than 18" from your opponent, turn 1 the entire table was difficult terrain. My opponent put his two min tac squads far forward to push me back then castled up on a hill on his board edge. He then used a ticket to buy a rule that stopped me getting scout moves then siezed initiative on a 4+ because of the same ticket.

That was pretty much the game. I got alpha-striked, then shot up every turn while trying to move through difficult terrain and rhino blocks. The nobz were wrecked by the terminators, led by a Librarian who'd cast null zone. All in all, I got tabled badly. Not much fun. My opponent didn't cheat and wasn't rude, but brought a mean list, gamed every advantage of the special rules and didn't crack a smile at all. Two upsides were that I got tabled quickly and went down the road with the GF to have a free wine tasting from a winery where my other friend works before game 3 and that my opponwnr got sulky when he won 3rd place, despite tabling two opponents. Length of time as a club member was the tie breaker for the tournament top winners, hehehe ;-)

Game 3
Game 3 was against Blood Angels again. Deployment was spearhead and you gained VPs for each unit in your opponent's deployment zone on turn 6 (all games had defined end turns). My opponent brought a few assault marines, 2 flamestorm Baals, the Sanguinor, a Furioso Librarian Dread and Mephiston. HEROHAMMER!!! :-D

It was a fantastic game and, though I tabled him, I was nearly tabled. The pic is from the very end of the game. The Baals rushed forward in their scouting moves, flamed the boys then got klawed/glanced to death. Sanguinor was mangled by a first turn nobz assault, the marines folded, the lib dread killed one nobz unit then got rokkited by the deffkoptas. Mephiston just rolled through so much of my army with his jump pack/Strength 10/Preferred enemy trio of psychic powers then came undone when we had a showdown between him and nobz. My last turn of the game let me kill off his last assault marine and claim a narrow victory due to tabling.


Great tournament and I had a bunch of fun.


PS: I killed the titan on day 2 with broadsides but it took 5 turns because of the void shield repairing every time and them making cover saves. Another tau player I loaned broadsides to killed it on turn 2 and won the knight titan model. It was fun seeing all the ways people used to kill it (Deep strike fusion crisis, Broadsides, Jetbike seer council, DS zoanthropes etc.)

PPS: If anybody is interested in a knight titan model, one of the club members has set up moulds and is thinking it will be ~$85-100 to cast them up depending on number of interested people. Let me know if you are interested and I will pass on contact details.

Monday, January 17, 2011

Battle Report; I unwittingly cheated :-( In other news, go check out a hot wargaming chick ;-)

Happy Martin Luther King Jr day everyone.

In a bizzare twist of the usual things, my otherwise holiday shy employers have decided to give us the day off today and so I have time to write some reflections on the battle I played with friends yesterday.

First up though, I have to help out an awesome, hot wargaming friend of mine Courtney. She and her husband (sorry boys, she's taken) are my new 40k gaming buddies and best friends for life stuff in general here in Maryland.

One of Courtney's greatest passions is nail polish and while it was not something I knew much of before spending time with her, I am impressed at the artistry and work done on a different palette with a different medium than with miniature painting. I know that few of my readers are likely to use nail polish, except for Old Shatter Hands on weekends ;-), but for those who have wives or girlfriends who might be interested go and sign up as followers to her blog Polished Casual. Courtney is a wargamer too so she will probably return the favour and check out your blog if you have one.


So the battle report and my cheating (Oh the shame).

To clear up my dastardly behaviour, I will detail the cheating first. I played as orks and declared the Waagh on turn 1, letting me get right into assault. This is not allowed as, in the words of the codex:

"This may not normally be declared on the first turn as a proper Waagh needs some momentum behind it."

I completely failed to read this ahead of the game and so cheated my way into combat on turn 1, not cool. In addition, any ork unit rolling a 1 for the Waagh run takes a wound as the boyz fight. I also failed to do this for one unit.

That aside, here's a short battle report.

We played 2vs2, 1000pts per side. I took my vehicular assault orks, my teammate Chris had shooty marines and we faced off against Iron warriors on foot and nasty Tyranids.

In turn 1 we took a few hits from shooting but nothing much. I then waaghed my way into combat with the iron warrior squads for big casualties on each side while Chris largely missed with his shooting. In fairly short order we started crushing the Iron warriors flank but then the outflanking Genestealers (each led by Broodlords) showed up on Turn 2 and pretty much tore our army apart. The ork's momentum was lost after the first power charge, the nobs were whittled down by Hive Guard (no FNP on S8 shots), took their revenge then were eaten by the Hive Tyrant and her bodyguards. The marines kicked hive guard butt, were ravaged by the Genestealers, finally wiped them out but we ended the game with about 7 marines left vs a Tyrant & Guard, 8 Genestealers & Broodlord, plus a full CSM Havoc squad. We conceded on Turn 5.


Key lessons:
- Don't cheat, read your rulebook AND codex fully ;-)
- Orks need to hit the lines in one block. Trukks are vulnerable to light weapons. My nobz were stuck in a stunned transport so they boyz hit the line without them.
- Only models within 2" of an engaged model may fight, so your big mob of boyz might not swing with full numbers. Keep this in mind when picking fights.
- Outflanking Genestealers are very dangerous. You need a way to take them out before they hit your lines as few things will deal well with them in combat.
- Even losing games are fun when you play with your friends :-)


So thankyou to Matt and Kira for playing against us (Husband and Wife team no less), thanks Chris for being my team buddy and D'oh me for not reading the rules properly.

Thanks for reading.

Pete

PS: Now go see some nice nail polish pics ;-)

Thursday, July 8, 2010

Battle report vs Old Shatter Hands. Blood Angels against tau.

Hey all,

So I've been lax in reporting on my game last saturday with OSH but I've finally got some energy to get typing. No pictures sadly because I forgot my camera. OSH got some on his phone so if he passes them over I will upload.

EDIT: A photo has come. This shows the critical moment before my Lib Dread got the charge.


So Blood Angels vs Tau. This was a chance for me to try assaulty marines and for OSH to get some field experience on the Multitrackers versus Targeting arrays debate seen here.

OSH took (roughly, this is from memory) the following, based on his 2k list brought down to 1500.

HQ - Shas'El: plasma rifle, missile pod, targeting array, target lock + 2 gun drones

Elites - 3 Crisis suits, 2 fireknives (plas/missile), 1 fireforge (fusion/missile), all with targetting arrays.
Elites - 3 Crisis suits, 2 fireknives (plas/missile), 1 fireforge (fusion/missile), all with targetting arrays

Troops - 6 Fire warriors in devilfish
Troops - 6 Fire warriors
Troops - 10 kroot and 5 kroot hounds

Fast Attack - 8 pathfinders with devilfish
Fast Attack - 2 Fusion Piranhas

Heavy Support - Broadside + 2 shield drones


After dealing with the blood angel codex organisation issues discussed here I came up with a list to fight against the Tau.

HQ - Librarian with Blood Lance (4d6" S8 AP1 Lance) and Wings of Sanguinus (move like a jump pack).

Elites - 5 Sanguinary guard with banner, because they are very cool.
Elites - 3 Sanguinary priests to give my troops Feel No Pain and Furious Charge.
Elites - Librarian Dreadnough with the aforementioned Wings of Sanguinius and Might of Ancients (+D3 attacks).

Troops - 5 assault marines with meltagun and power weapon on the sergeant. No jump packs and in a rhino.

Fast Attack - Baal Predator with twin-linked assault cannons and heavy bolters.
Fast Attack - 3 Land Speeders. Multi-melta and flamer, multi-melta, assault cannon and heavy bolter.

I was trying to play a nasty tournament-style list. It's a long way from what I would usually play but I went with it to give OSH practise for the NOVA open he's going to, where BA will undoubtedly be well represented. I did choose sanguinary guard because they are cool though, and I equipped the landspeeders WYSIWYG rather than just going melta/flamer. A bit more expensive but more characterful in my view.

I will go generally over the game as it's been a few days and I can't remember exactly what happened on what turn.


OSH goes first. My Sang Guard are deep striking, Baals outflanking. His firepower blows up one rhino and knocks the storm bolter from another. In my first turn everybody hustles forwards at high speed (woah, fast marines) with my speeders turbo boosting and my librarian dread jump pack running some 15"+. The foot librarian hits the piranhas with blood lance but no penetration (S8 vs AV11).
OSH proceeds to immobilise my damaged rhino, kill 2 speeders, blow the MM from the third, knock off the dreads DCCW and kill a marine who is on foot. In my turn I get the Sang Guard and pull off a critical move. Thinking like I'm playing warmachine, where clearing a charge lane to the caster can win the game, I jump my lib dread into a small gap between a devilfish, fire warriors and drones. My speeder then comes up and flames the troops, opening a charge gap to the crisis suits behind the drones. The sang guard blow up the devilfish with their inferno pistol and the dread charges into combat. Even with only a S6 force weapon, he wins combat. Doesn't catch the crisis team though, but sadly for OSH, they run from the board. One flank is now collapsed.
OSH retaliates next turn by killing the dread and shooting a couple of sang guard with the piranhas. His broadside also pastes my librarian who'd moved out to get a blood lance shot. Otherwise, he's pretty backed into a corner on the 4x4 board. My turn gets me both Baals, one on each flank. I basically grind forwards with my marines, one squad assaulting and beating the kroot over a couple of turns, the speeder flames out the pathfinders and I move forwards.
OSH keeps fighting and downing marines but he's too hemmed in and my pincer movement ends up having only his crisis team still alive by turn 5 and facing a lot of foes.

Victory for the Blood Angels.


So BA thoughts...

- Blood Angels are fast! Having up to 18" movement on all rhino chassis vehicles is a huge deal and let me clear the board with ease. I was restricted much more by terrain than by distance. Scouting/outflanking Baals are super nasty too.
- Jump pack librarians seem a little unfair, particularly against Tau where they can't damage them in assault.
- Blood Lance is nasty against big tanks but is still a single S8 hit and will roll low on a number of shots. It does better if you can line up multiple units to take a hit. I consider it a powerful but well balanced power.
- Getting furious charge and Feel No Pain is extremely good for assault troops.

Tau thoughts

- I think I'm with OSH on getting +1 BS for crisis suits rather than multitrackers, particularly against MEQ. At range his suits would be almost deathrains (66% hit rate vs 75%) and then when I got into plasma range I'd be hit by BS4 AP2 shots. It is particularly nasty against Blood Angels as I had no wound allocation games to play. If he'd fired missiles too I could have stacked the plasma shots onto particular models and gotten my FNP saves on others. As it was, I had no save at all (see next point) and my marines went down fast.
- Markerlights are great in terrain. OSH got some good hits (5-6) on certain turns and would strip my cover saves as well as boosting his hit rolls. I'm just glad he didn't have any seeker missiles.
- Facing a footslogging Tau army is quite tough as they can put out a lot more firepower than the usual mech force. On a bigger table, I think I would have been a lot more challenged to win. The smaller table and the librarian charge really made it work for me.
- Drones can be used very very effectively as movement and assault blockers. They also carry pinning guns which can be used to penetrate rhino armour. Don't ignore the little guys if they get behind you or you might end up HAVING YOUR BAAL DIE TO TWO LITTLE FLYING TOASTERS WHO GET A PENETRATING REAR ARMOUR SHOT AND ROLL A 6. Ahem, caps lock off. Me and OSH definitely laughed about this one and it was a great comeback moment that weakened my right flank.


We discussed what OSH could have done to change the game and I don't think there were any big failings. The dice and table were kind to me for sure. I suggested that in the tournament he should be willing to break the HQ suit off from the team to take a charge if need be. Had that happened, I would have probably killed the Shas'El but then lost my dread to a full team of Crisis suits with fusion and missiles. Not losing that flank would have let OSH hold me off a lot more effectively.

I look forward to reading about how his tournament goes as at 2k he will have a lot more railguns. We both agreed that heavy tanks should be ignored in favour of rhinos for railguns as a hit will always at least glance and slow the attack.

Thanks for reading and thanks OSH for the game and for loaning me the models.

Monday, June 14, 2010

Played my first game of Warmachine this weekend.

So after months of moving apartments, managing life, getting used to a new city and being the proud parent to two dogs, I finally got a game in. It was warmachine and so this post will be a little lengthy to help those who've never played get a feel for the game flow compared to 40k/WFB.

The store where the Fail Gamers club plays in Frederick is called Hobby Town USA and it is quite frankly massive. The front part of the store must be 150x150 feet easily. It's about 10 times the size of most GW stores I've been in. It's not just wargames though as there are every kind of hobby option in there. In the back of the huge store is a seperate area with workbenches for radio controlled car fiddling (based on how many people were workign on it) then there is a huge (100x50) track for racing those cars on. Next to that is a long room where they have half a dozen tables set up for wargaming. There is a goodly stack of terrain that the club owns and it was cool to see it looming over us from the shelves.

I found two Warmachine players who were good enough to not only give me a starter game, but one of them sat out so I could use his models. He basically gave me free reign over his collection so I could play a small game with the other guy. What a nice gesture.

Our game was at 15pts, which is the starting level for most WM games and represents a small skirmish (units generally go in cost from 4 to 10 points, warjacks are 4-12, solos 1-5, just to give an idea of the game level). The only model that is free is your warcaster, who represents your general and is critical not only for their power, but because you lose the game if they die.

I was given control of the Protectorate of Menoth, a group of religious folks who would be very happy if everybody worshipped Menoth. If everybody won't worship him, the protectorate would be happy to set everybody on fire. There is a strong theme of faith and fire in this army. My opponent had Cyngar, who specialise in ranged combat and lightning.

My army was (all pics from Privateer Press):
High Exemplar Kreoss is quite well rounded as warcasters go. His combat ability is strong, but not excessive, he has good spells but can't win solely through them and his feat (a once-per-game spell each warcaster has) knocks down everyone in his control area, making them easy for your other troops to hit and forcing them to waste their turn standing up.

Crusader Heavy Warjack. This is a pretty basic heavy jack that hits people with a flaming mace, or can smack them with its open hand (or throw them, headlock, armlock etc.). It's a basic, but well regarded beatstick.


The Castigator brings two open fists (now we can two-handed throw models) that also sport flame throwers. As a special ability it can set everything around it on fire, then wade in with fists swinging.


Holy Zealots bring the power of the massed faithful to Menoth's cause. They are armed with maces, but mostly go into battle to throw their hand grenades. They are a cheap unit that can bring a lot of pain if you let them get too close. Definitely a tough one to face as you either spend precious time/firepower/attacks dealing with them (leaving the other foes alone) or you risk getting grenaded to pieces.


The Paladins of the Order of the Wall are holy warriors who believe in redeeming the populace and can be at odds to the rest of the priesthood who favour inquisitors and cleansing fire. In battle though they bring magical weapons that hit very hard as they are weapon masters (meaning +1D6 damage on each attack).


This army pointed up as:
Kreoss: -5 pts
Crusader: 6 pts
Castigator: 8 pts
6 Zealots: 4 pts
Paladin: 2 pts

Now there was a big change when Warmachine Mk2 came out to make warjacks more useful. In the first edition they became overshadowed by infantry for effectiveness and the game was often called Infantrymachine. No longer though. The revamp to the entire game let the developers up the abilities of warjacks and make them more important. One method was by making warcasters cost nothing and giving them a number of warjack points. These essentially are free points that can only be spent on warjacks. So my 20 point army above is actually 15, as I can use Kreoss to save me 5 points on one of the warjacks. A good idea and it can make playing different casters intersting as they have different points (generally 5-7 jack points though).


My opponent's army was much less melee oriented and his plan was to bring me down at range.

Lt Allistair Caine - think a warcaster who stars in a John Woo Wild West movie. Two pistols, lots of speed and a feat that murders infantry (he gets one free shot at everything within 12", regardless of other models in the way)


Defender Heavy Warjack - A heavy jack with a nasty hammer (burns out jack cortex controls) and the biggest cannon in the game.


Arcane Tempest Gun Mages - Tricksy pistol wielding folks who have access to special ammunition. Like a squishier version of Sternguard veterans.


Arcane Tempest Officer - Leader for the gun mages who also can be a jack marshal, giving him control over a warjack.


Hunter Light Warjack - A very Tau-like jack that isn't so tough but wields a nasty armour piercing cannon designed to take on big jacks and do damage to them. This jack was marshalled by the AT officer, meaning he could fire the same special shots as the mages. Imagine a dread who can fire special sternguard-type ammo....yep, nasty.


The Game


I won the roll to go first. Kreoss gets seven focus points per turn and I gave one to each warjack as they need them to do anything other than move and attack. This means running, charging, special attacks, boosted attacks (more likely to hit/more powerful) and extra attacks all need focus. I knew I would have to close to stop getting shot to pieces so basically everyone ran forward this turn. Running doubles their speed at the cost of any other action. Kreoss didn't run until after he'd cast a defensive spell on the Crusader warjack. He and the Paladin also tucked in behind the warjacks so they couldn't be shot easily. I wasn't too worried at this stage as Kreoss had 3 focus left and each point added 1 to his armour. In my opponent's turn, he used the hunter's armour piercing gun (boosted by the jack marshal's special ammo) to cripple one arm from the Castigator (ouch) then used the gun mages special ammo to push it backwards. The defender killed a zealot and not much else happened.

My second turn I charged in again, getting as close as I could while still being protected. Nobody could reach anything at this point sadly though. In return, the gun mages pushed the castigator back, opening up the Paladin to be shot and he was duly taken to pieces. My zealots also lost two more of their number to Caine's deadly pistols. The defender managed a sniped (extended range) shot into the Castigator and cripplied its legs, meaning no running or charging, drat!

It was crunch time on turn 3 as I couldn't keep taking all this fire without doing anything. I moved Kreoss forwards so that all of my opponent's models were in my control area (a cirlce 2x the size of your focus stat, so 14" in my case) and popped my feat, knocking everyone down. My crippled Castigator waddled forwards, the zealots moved up to bomb the downed defender, crippling the gun arm and my crusader came out menacingly, ready to charge next turn. Kreoss was the star though as he dropped a flaming template spell that killed off four of the gun mages, including their officer. The marshalled Hunter warjack became inert and could only be recovered by Caine getting all the way over to it and spending a turn in B2B...not going to happen. My opponent had to spend his turn standing up but he moved the Defender into B2B with the Crusader, hoping to block off a charge against Caine. The warcaster used his focus and deadly gun skills to wipe out the zealots.

In my turn, I pumped focus into the crusader to give it multiple attacks and it happily smashed the defender into pieces. Knowing I had no way to get Caine this turn, I ducked Kreoss into cover behind the jack. My opponent then used his gun mages to push the crusader back, just far enough for Caine to get a shot. Caine went all out, popping his feat so he got a free shot at my three models, then buying as many shots as possible to try and gun down Kreoss. I took a lot of damage but hung on with 5 points left.

In my turn, the crusader and Kreoss both charged Caine and by using all of the focus we had, managed to land a hit on the tricksy warcaster (he's evasive but not tough) and defeat him. I also move the Castigator into combat with two of the remaining 3 AT gun mages, just in case we don't get Caine down this turn. Phew, close game!


Thoughts on a new game system


Well I really enjoyed my first foray into Warmachine. I can definitely see this being a game I keep up with. Unlike 40k, where I like to stay at range for the most part, I found myself itching to get in close to hit things and make a mess in melee. The models are really fun and the way they play together is very interesting.

The Good
- Sequential models, not phases. Each model does its own thing before the next goes. This is a huge change from 40k where everybody moves, then shoots etc. It adds a whole different layer with the combinations that come up with it. This was a simple game but I figured out to activate Kreoss first when I did his feat so that everyone else could take advantage of the easy-to-hit knocked down foes. My opponent used his AT gun mages to open up lines of fire to my paladin and warcaster for other models to take advantage of. I think this will take a while to get used to as it is quite ingrained for me to consider my own models as cover that can't be removed unless they are totally destroyed.
- Damage grids. I love how the warjacks and warcasters have damage boxes that need to be filled out before they are destroyed. It gives a good challenge to hit them hard enough to bring them down, while still letting units contribute until they are completely destroyed. I don't like how a penetrating railgun round has the same chance to blow up a rhino as a Land Raider once it gets past the armour. Here you can tell the difference between a Cryx Bonejack with maybe 18-20 damage boxes and a Khador heavy jack with 34.
- Spells and funky abilities. Nearly every unit has some cool thing it can do that can work really well with other units. Combinations are a big part of the game and finding the best ways to use your units together is the difference between winning and losing.
- Feats. I love the way each warcaster gets a great big dollop of kick*ss once per game. It really gives you a way to turn things around and make the opponent pay but also adds a layer in that you need to be careful not to pop it too early, or too late.

The Bad
Nothing much so far ;-)
- In the future though, I can see the frustration at playing against somebody who knows the models inside and out and pulls out a combination that I haven't even considered. I'll reflect on this after more games though.
- The expense. I know that I'm tempted by so many models and they can be relatively pricey ($20-45 per warjack). The good thing is that the game can be played from the lowest points levels upwards so there is no feeling of having to buy another $200 of models just to play (like I feel about my Tau).


So hopefully you enjoyed reading this far and I look forward to hearing any thoughts or questions.

Pete

Friday, March 12, 2010

Sometimes the dice just go your way. Battle report vs OSH.

Poor sidestriker. The dice were not kind to him.


So last night was the clash of my new 1850 marine list vs Old Shatter Hand's 1850 list. We played at Dream Wizards among the masses of MTG players and some other 40k/Warmachine folks. I noted the prevalence of Deff-Rollas among the ork players now that the FAQ has ruled that they can hit vehicles ;-)

So my list was a heavy tank-deathstar-hybrid sort of thing.
- Captain with Powerfist
- 5 Terminators with Cyclone Missile Launcher
- Multimelta dreadnought
- TL-Autocannon dreadnought
- 10 Grey Knights with 2 Incinerators
- 10 Tactical Marines with Missile launcher and Meltagun
- 10 Tactical Marines with Missile launcher and flamer
- 5 scouts with bolters
- Land Raider
- Land Raider Redeemer

Old Shatter Hands brought
- Fireknive Shas'El with 2 bodyguards (target arrays, a target lock, 2 drones)
- Fireforge (Fusion/Missile) Shas'El (target array)
- 3 Deathrains
- 10 Kroot with 5 kroot hounds (converted from LOTR Wargs, great idea).
- 9 Fire Warriors in Devilfish
- 3 Piranhas with fusion
- 2 Hammerheads with railguns and SMS
- 3 Broadsides with Target arrays, leader with target lock

We rolled up pitched battle deployment and annihilation as missions. In many ways, this feels like the most original way to play 40k to me. Basically we line up and kill each other.

So the game can be described in two ways and it looks very different based on which way you consider. We have the game result and the tactical part of the game.

Game result: A strong victory to me (7 kill points to 4, with the chance of adding more kill points if we played another turn and not many chances for OSH to get more).

Tactical result: A close fought battle.

So what happened to lead to these divergent results?

Basically OSH deployed with a central firebase of the Deathrains, Broadsides and hammerheads, sent his piranhas out wide and put the rest in reserve. I played cautiously with my Land Raiders by putting them on my far right so that they were out of the way of the railguns in the early turns. In the centre I sent my dreads and Grey Knights with the captain. The tactical marines combat squadded and took supporting positions.
As I advanced up the centre with my Deathstar and went to my right flank with the Land Raiders, Old Shatter Hands swung his forces to the opposite flank and kept up a strong rate of fire. The broadsides stayed as an anchor so that they could fire and also so I would continue to come forwards to assault them as there was a big difficult terrain block to my left that would have left my Grey Knights in the open if they'd tried to change direction.
I responded by continuing my sweeping manouvers and gradually caught up with a battered the Tau forces. Overall it gave me a strong win as I dropped a lot of troops and didn't take too many casualties. Tactically speaking, OSH played well and used the Tau strengths to put me in tough positions over which units I would expose to fire.

On the other hand, the dice completely killed him....

I managed to make roughly 90% of all cover saves on my vehicles (from smoke or terrain), his attacks routinely failed to penetrate (even the broasides rolled 1s vs the dread) and when they did, the damage rolls were weak. I had one dreadnought immobilised and with no autocannons and the other lacking a multimelta but it had taken 5 turns of shooting to get them to that point. The Land Raiders were impervious to the few shots that came their way and if I hadn't immobilised my Redeemer on dangerous terrain then I could have been even more aggressive with my heavy armour. I rolled well on shooting in general, really well on assault attacks against OSH's vehicles and generally had a great game. I even started to feel bad by the end as it seemed so stacked in my favour for this game. Only the kroot did well on their rolls as I tried (in vain) to blast them out of cover and claim another kill point.
I'm sure we'll have a rematch where the opposite will occur and I have to thank OSH for remaining a great opponent even when it was all going wrong.

As far as his list went, I think it is fairly solid. The tournament he's looking at is 2000 pts so we talked about adding pathfinders, dropping one FW devilfish (they can use the PF one) and using the points to add another piranha. This would give him 2 units of 2 fast fusion blasters and the markerlight support he will need to deal with heavy cover saves.
In any case, a great (albeit lucky) game for me and I've already offered to swap sides and take Tau against OSH's blood angels soon.


PS: On a side note I met the local Press Ganger (Warmachine/Hordes intro guy) who has offered to show me some cool Cygnar stuff next week if I make it to DW again. Yay for steampunk walkers.

Wednesday, February 3, 2010

Tau vs Blood Angels Cityfight Photos.

Hey folks,

Old Shatter Hands sent over the photos of our game so I am posting them up seperately from the game rather than trying to stuff them into the same post. I'll try to remember when each photo was taken in game.


These two show the combination of my colour scheme with OSH's. We agreed that they looked pretty neat together and it will be cool to see them lined up alongside one another when it comes time to have a big apocalypse game with them.


Stealth suits and deathrains ready to open fire.


Me checking TLOS.


The Chaplain's hiding spot.


Tau firing line.


The Skyray blocks the Death Company.


Again without the flash.


Our version of a stunt shot with rapelling lines for the Fire Warriors.


Thanks OSH for all the great photos and for the great game. Also, check out how cool his terrain is for the game. I love the ruins and the homemade buildings in particular.

Monday, February 1, 2010

Cities of Death Battle Report vs Old Shatter Hands.

Hey everyone, here is my first battle report of the year.

After our last tangle on his 4x4 urban board (see http://ghostnebulae.blogspot.com/search/label/Battle%20Report) OSH and I decided that we needed to scale the game down for a better experience (and a shorter game length). We settled on a 1000 point cities of death game. Braving the icy chill of the snowstorm that hit the DC area on saturday (20 deg F/-6 deg celcius) I hopped on the metro and struggled the few blocks to OSH's place in the snow.

Now OSH has been playing with his Blood Angels a bit more recently and so wanted to stay with a fast assault army. By contrast, I've been using marines and I jumped at the chance to have a go with some Tau. Fortunately OSH has plenty of Tau models so I could flesh out my guys with some of his to make the force I wanted.

My list:
- Shas El with Fusion and Plama, 2 gun drones.
- 3 Deathrains (Twin Linked Missiles and flamer)
- 3 Stealth suits with marker drone
- 12 Fire Warriors
- 12 Kroot
- 6 Pathfinders with Devilfish (Multitracker, Disruption Pod)
- Broadside with Targetting Array and 2 gun drones
- Skyray with Smart Missile System, Targetting array, Target Lock, Multitracker.

I was partly playing around with some different options but I think it is a reasonably solid list. It felt weird not to have hammerheads running around but they are just too vulnerable in city terrain for me and can't always make the most of their firepower. I was hoping that with a decent amount of markerlights I could drop seeker missiles on OSH and boost firing effectiveness enought that I could torrent through his armour saves.

OSH's List (from memory, may be slightly wrong).
- Jump pack Chaplain (plasma pistol)
- 5 Assault Marines (Plasma pistols, 1 power weapon)
- 10 Tactical marines (Missile and Flamer)
- 10 Tactical marines (plasma cannon and plasma gun) combat squadded.
- 5 Scouts (Missile Launcher)
- 3 Death company marines.

The mission we rolled was to control the city ruins. There was one in OSH's deployment zone, 1 in the centre and 2 in my deployment. For strategems, OSH took infiltrate so his scouts could get close and I took Rapelling lines (can deploy out of a skimmer along its move path with a dangerous terrain check). It was partly just for the cool factor but also I thought that the Fire warriors could make a later game rush for one of the buildings.

OSH rolled first turn and deployed forwards towards the centre with everything except the plasma combat squad, which held his home ruin, and the scouts who snuck round the building on my far left. I put the broadside, Shas'El, Kroot and Skyray on my left, the pathfinders and devilfish behind a barricade in the centre, and my Fire Warriors, Stealth suits and Deathrains holding the right. Then I was lucky enough to sieze the initiative...OSH didn't look so happy.

I figured that I needed to make the most of my 2 turns of shooting before the blood angels ripped me apart in assault so I moved to do this. The kroot took position behind the barricade, the skyray moved to open LOS to the assault squad with the chaplain and my stealth and deathrains jumped out to shoot. For firing, we managed to put three markerlights on the assault marines, the firewarriors dropped one, my shas'el plasma rifled one and then I popped three seeker missiles into them from the Skyray (I was determined to fire all of the missiles this game). Sadly the broadside rolled a 1 to wound. On the other side, the deathrains didn't kill any marines and the stealth suits were about 1" out of range. OSH mostly just moved forwards towards the central building. His chaplain jumped out of sight on my left, the scout missile man peeked around the corner, and a plasma cannon blast melted four kroot.

My second turn let me open up with a bit more firepower but I didn't kill as much as I would have liked. The pathfinders did manage to remove the cover save of the marines in the centre and my broadside splatted one. In reply, OSH failed to damage the skyray with a krak missile, but killed a broadside drone with plasma fire. His chaplain jumped over the building and into combat with the kroot, killing four, losing one wound and then sweeping up the survivors...ouch.

For the third turn I moved the skyray out in front of my barricades, looking to block off the mass of marines heading my way. I also shuffled the devilfish out as well ready to pick up the fire warriors. I knocked out a couple of the assault marines in the centre after markerlighting their cover away for the broadside and hitting them with various small arms. My Shas'el blasts the chaplain with plasma and fusion fire and moves down to go for the scouts. OSH gets his tactical marines into the central building to claim that objective and sends his assault marines after the stealth suits. The suits hold out, losing only the marker drone. The death company must go for the Skyray but fail to break through its armour.

Fourth turn sees me needing to make a real push for the objectives as OSH is holding two and close to getting a third if his assault marines beat up my suits. I send the fire warriors into the devilfish and they go skywards, leaping out on the rapelling lines to land on the top of the central ruin. The deathrains pop some of the marines in OSH's home ruin and my skyray pushes forwards to clear my front lines. With some markerlight help, my fire warriors, skyray and broadside gun down one of OSH's tactical squads. Only two marines left in the middle ruin now. In assault, OSH's assault marines cut down the stealth suits. In his turn the death company chop up the skyray (furious charge and rending are nasty) and the assault marines get into combat with the deathrains, killing one.

Fifth turn I really lay on the firepower to try and clear OSH off the objectives. My Shas'el shoots and assaults the scouts, killing them. My fire warriors and devilfish manage to torrent OSH's home plasma squad to death, the pathfinders finish off the other tac marines in the centre and my broadside splats a death company marine. In the assault phase I lose another wound from the deathrains. OSH's turn is short as he only has 4 models remaining. His death company charge at the devilfish but don't reach it and the assault marines kill the deathrains and consolidate onto the nearby ruin.

OSH rolls a 2 and the game ends in a draw with one objective each, though OSH gives me the moral victory for holding another ruin (though not with troops). I later realised that I'd forgotten to make a dangerous terrain check for the rapelling Fire Warriors so I give him the moral win as well.

Whew. Well that was a blast to play. I really like Cities of Death!

Game wise, there was a lot of luck swinging my way. Rolling to sieze the initiative was a real kicker as I got to pummel OSH's troops while they were out in the open. Knocking out one assault squad before it could move was great for not getting overwhelmed too early. I think that my army choice overall wasn't too bad. The markerlights were really key for forcing OSH to take certain saves or to boost my shooting. It's the first game where I've actually really fired off the seekers from my skyray so that was a cool use of markerlights too. The stealth team suffered with their short range and the speed of OSH's assault troops so next time I might swap them for another squad of fire warriors. Overall it was really fun to play on such a constricted board where every turn was key and I loved the tight fire lanes and movement zones etc.

I will add photos tonight probably when OSH sends them to me.

Monday, December 7, 2009

Battle report against Old Shatter Hands' cadre. December 2nd


Spidertank, Spidertank,
Does whatever a spidertank does
Spins a web, superheavy size,
Catches vehicles just like flies
Look Out!
Here comes the Spidertank.


So here comes the battle report that was teased about a little while ago. Old Shatter Hands sent me all of his pictures so hopefully I can get them loaded into the post and formatted properly.

The game was based on the rules for the upcoming Inner Circle tournament on december 12th in Glen Burnie. Basically it's 1850 pts, standard FOC, five objectives (one in each quarter, one in the table centre) then you pick 5 killpoints from the other army that decide the game if objectives are drawn. It's a neat system because you can pick out the squishy bits of your opponent's army and it means that you don't get really penalised for having too many killpoints (since only 5 can be claimed). This will probably help balance IG vs marines etc.

With Old Shatter Hands' encouragement, I brought my Hunstman Spider Tank (HST) out for its first outing since I finished building it. We used the rules in teaser post below and it seemed to work out alright. It's important to note that we're playing on a 4x4 table instead of a 6x4. This turned out to be a big factor in OSHs ability to manouvre.

Army lists were in the teaser as well so let's just get on with the game.

Deployment


So basically that shows everything that was on the table. My captain is with the central tactical squad to avoid any first turn sniping. Technically it's turn 1 you're seeing but we forgot to do top down photos until then. My scouts are infiltrated behind the central building and the terminators are deep striking. OSH has his Devilfish and Fire warriors in reserve, the kroot are outflanking.

For kill points, OSH chooses my three tactical squads, the dreadnought and my captain. I choose the kroot, the hammerheads, sidestriker and the piranha gun drones. My thinking is that the kroot will go down easily, sidestriker only needs a lucky shot and I'll get a killpoint, the gun drones will pop off easily enough, and the heavy support is something I'll be firing at anyway so it makes sense (I think) to add them.

Turn 1

OSH goes first, boosting the piranhas into the centre of my formation. He keeps them facing outwards so that all shots will be on AV 11 (you must fire at the closest facing of the closest vehicle in a squadron). His firing is pretty good. The hammerheads drop a bunch of marines from each tactical squad on the flanks. The deathrains chip in firing at my left flank and I lose six marines from that squad by the end. The broadsides get no such luck against the HST and miss, even with Targetting arrays.

My turn one is mostly moving. I surge forward with everything. The captain detaches to charge the piranhas and my scouts make a run forwards to try and krak grenade the hammerhead (like last game).


Come on Brothers, we can make it...

My firing is not too hefty. The devastators and spider tank fail to damage the hammerhead on my right flank. My assault phase is good and bad. The scouts fail to do anything, leaving them out in the open to get shot up next turn. However, the captain and spider tank roll three 6s from seven attacks. The captain destroys one piranha and knocks the gun off a second, which the spider tank then shreds. Never forget that super heavy walkers can assault different target to what they shoot. The gun drones break off and form a squad by the central objective, though they are pinned

Turn 2

OSH gets one devilfish from reserve and his kroot come in on my left flank. He uses the devilfish to take the objective in his right quarter and the kroot charge my remaining 4 tactical marines on the far left. The deathrains stun the dread as well, darn it. OSH and bodyguards gun down the scouts. Fortunately the remaining piranha misses with its fusion blaster (good since it had flown over the HST to shoot the rear armour) and the railguns fail to make any impact. Not for the first time, OSH kicks himself for using the hammerheads in an anti tank role. In assault, the marines kill off kroot for no losses (love power armour) but the bird men stay in the fight.


In my turn, the terminators show up. I drop them in OSH right backfield but they scatter into the centre of his lines. Oh well, let's trust in our 2+ save. My left tactical squad moves into combat with the kroot, the right one runs forward, the captain charges the gun drones, the HST and sternguard move forwards. My shooting is pretty good with the HST blowing up a shield drone and broadside, terminators killing OSH's drones and the devastators knocking down the piranha (two lascannons and two krak missiles to the face will do nicely, thanks very much). In assault, the kroot drop and I roll high for my consolidation forwards. I pop smoke on the dread as well.

Turn 3

OSH gets another devilfish (in on his left). His firepower whittles away at my marines but the HST keeps getting saved by his poor rolling or my good luck on 5+ cover saves. That luck flips in spades when OSH turns his fireknives and sidestriker on the terminators. They are wiped out except for the cyclone guy. Ouch, when will I learn how deadly tau plasma/fusion fire can be? Luckily the smoke saves my dread from the attention of the deathrains.


Now that's a big spider infestation...

I surge forwards again. The HST knocks sidestriker down to 1 wound, the cyclone guy brings down one of OSH's bodyguards and the tactical melta stuns the devilfish (I think anyway). I run the captain up to the shrubbery (bring me another shrubbery!) by OSH's backline. Hopefully he can get into combat with that powerfist of his. Some other fire must have gone down too as OSH was on 1 wound by the next turn but I forget when that happened.

Turn 4

OSH gets his last devilfish so everything is on the table now. He pushes one forwards on his left to block up my movement and hold the objective. I lose my reduced tactical squad on the left to OSH and bodyguard and my captain gets melted by Sidestriker (oh well, that didn't work). The HST continues to be elusive and gets missed by the railguns. Maybe those spidey senses are tingling :-)


The HST has ineffective shooting but charges the devilfish in the way. My plasma tactical squad shoots down the broadside gun drone. My other tactical squad misses the devilfish on the objective but the dreadnought wrecks it, forcing the Fire warriors to bail out of the back. The sternguard gun down some fire warriors in the centre (can't remember when they deployed, oh well). The HST hits once on the devilfish and immobilises it. The terminator manages to land a krak missile and a storm bolter wound on OSH and bodyguard. Luck is not on his side as the bodyguard is hit with instant death and OSH fails his 3+ and bites the dust. The tactical squad nearby guns down the fire warriors who bailed out of the devilfish.


With their backs to the giant red tape measure, OSH and his bodyguard have no way out

Turn 5

OSH jumps his hammerheads back and to the side, looking to put fire on my tactical squad holding the objective. He kills off a few but can't get them all. The lone terminator is blasted however. The dreadnought finally succumbs to the hails of missiles that the Deathrains have been sending his way.


My 'stunt thumb' in the photo to show the Deathrain's celebration

Unfortunately for OSH, the HST is still in contact with the devilfish. Three damage rolls later (auto-hit for immobile target, S10 +2D6 penetration on rear armour 10) and the devilfish is a smoking wreck, leaving just two fire warriors alive to face down the rampaging super heavy (see first photo).

The spider tank then rampages forward and opens fire. Its rail rifles bring down two loose gun drones from a devilfish and then the demolisher gets a perfect shot and wipes out the deathrains in one go. My tactical squad nearest the HST charges into combat with the broadside to stop it shooting up the HST. Unfortunately they fluff against the 2+ armour and lose combat, though don't run.

Turn 6

One hammerhead comes to the centre to try and blast off my marines from the objective. The squad is knocked down to 2 members but stays in the fight. The other hammerhead jumps over into my backfield but doesn't get a good hit on the HST. Sidestriker also has a go with his fusion blaster but no luck. He jumps back into cover. I fluff against the broadside again. Drawn combat.

Desperate to hold onto the single objective I tuck my marines as far into the nook of the devilfish and terrain as I can.


And we shall know no fear if there is a great honking wreck to hide behind

The HST has nothing to eat up and the demolisher cannon scatters off the board when I go for the hammerhead. The sternguard do better. They can see sidestriker through the trees and rapid fire 10 S4 AP3 vengeance rounds at him. Enough hit that he fails a cover save and drops, killpoint. My devastators fail to land anything damaging on the hammerhead and, once more, I fail to scratch the broadside.

We roll and the game ends at this point. I win with two marines on an objective. The others are contested (OSH's left flank with the broadside, tac squad and two fire warriors) or not held by troops. For killpoints we end up even at 3 apiece. I claim the kroot, sidestriker and the piranha gun drones and OSH gets the captain, one tactical squad and the dreadnought.

To show how much death was inflicted, here is the board at the end of the game. Note that only the two hammerheads are still functioning. The other Tau vehicles are wrecks we left to look cool and show dangerous terrain.


Thoughts on the game

Well first of all. Big kudos to OSH for hosting the game at his place (thanks for the dinner too) and letting my bring a super heavy to the table for a normal game. We talked through things and decided that the HST is not overpowered, though it is a little bit potent on such a small board. To be honest, that was one problem with the game. On a 4x4 arrangement, OSH was very limited in his ability to get out of the way and use his mechanised mobility. On the other hand, the limited manouvering space meant that I was exposed to his firepower a lot of the time, or had to move into fire zones in order to advance any further.

I feel that OSH's tournament list is strong though we both discussed alternate piranha tactics (since i have two and am going to get two more at some stage). In our first game he used them mostly in a harassing role and avoided my best efforts to take them out. This time around he was much more agressive and perhaps paid the price for that. Overall the little skimmers are very resilient to firepower but can go down quite easily in assault. The trick to beating them is to charge with things that aren't easily affected by flechette launchers. That means walkers and independent, multi-wound characters. Where a squad of 10 marines would take 15 wounds on average (3 flechette launchers wounding on 4+) and lose 5 before getting to attack. My captain on the other hand, would be wounded 1.5 times on average, and only take 0.5 of a wound. In this game, he took one wound and dealt back two hits (good rolling admittedly). Overall, a mixed strategy would seem to be best for the piranhas. Use them to corral and threaten things so that they can soak up firepower and save the aggressive stuff for really critical times in the game. Anyway, just a few thoughts.

I go with my same conclusion for the last game about OSH's firepower. It doesn't seem like too much at any one time (a marine here, two more there) but by the end of the game I'd lost 6 terminators, a dread, captain, 5 scouts and about 25 tactical marines. My units generally performed well and I'm mostly happy. The devastator squad didn't have as much of an impact as I might have liked so I may try something else next game. Thanks to OSH I have a new godhammer land raider so perhaps putting a combat squad of tactical marines in there and holding a home objective is in order. It'd definitely be tough to crack an AV14 bunker with lascannons and heavy bolters that is blazing away at you.

Anyway, thanks for reading and we'll see if the spider tank wants to come out and play again sometime.

PS: I managed to snap off the raised leg of the HST when I got home and put the box down to get my keys out. Damn resin and its brittleness. Fortunately it's a neat break so I'll break out the epoxy and fix it up soon. I need to get carving on some foam for that thing.

Thursday, December 3, 2009

Battle Report Teaser and special rules.


Hi folks.

For those who read the Tau of War (http://tauofwar.blogspot.com/) you might notice that i've started playing against Old Shatter Hands with my marines. Last night we had a very close fought and brutal game to test out his tournament list and new gaming table.

First of all, this post is not the battle report. I've been working through my memories of the game and trying to place when all of the key events happened. OSH has promised to send me over his pictures of the game so I can make it a proper report.

It was a small and deadly game. OSH has a 4x4 urban style table and there was a reasonable amount of terrain given the size. He brought his mech tau list which is:

- Old Shatterhands (Fireknife (FK) Shas'El), two FK bodyguards and two drones.
- Shas'El Sidestriker (Fusion and Missiles)
- 3 Deathrains
- 3 x 6 Fire warriors in Devilfish
- 3 Fusion Piranhas
- 2 Broadsides with 2 shield drones
- 2 Railgun Hammerheads

I came with a specially made footslogging marine list (similar to the last battle report with me on OSH's blog)

- Captain with power fist
- Multi-melta Dreadnought
- 6 Terminators with cyclone missile launcher
- 5 Sternguard
- 3x10 tactical marines (Missile/Plasma, Missile/Melta, Multi-melta/flamer)
- 5 Scouts with heavy bolter
- 10 Devastators with 2 missile launchers and 2 lascannons
- Huntsman Spider Tank (Super heavy with custom rules)


Now the last item is probably the one that will draw the most attention and justifiably so. Since I don't have the pictures of last night ready yet, I will shamelessly use one taken from the gallery of the guy who makes the model (http://www.ramshacklegames.co.uk/).


This thing is a beast of a model. It's baneblade sized with its massive legs and we had a few problems figuring out how to fit it around the terrain and other models. It's a really intricate resin kit but fits together very well and has so much character. Curtis, the guy who runs Ramshackle Games, is one of the nicest people you can deal with. I got the spider tank, two other vehicles and a host of figures from him for a great price and he even included a set of miscast pieces for conversions etc. for a cheap cheap price. More info on my vehicles can be found at http://www.lead-adventure.de/index.php?topic=13537.msg168754#msg168754 and http://www.lead-adventure.de/index.php?topic=13496.msg162183#msg162183.

Now the tank was made for a different game system so I needed to make some suitable rules for it. Thanks go to OSH at this point for agreeing to play against custom designed rules and a superheavy unit in a small game.


Name: Huntsman Spider Tank
Points: 350
Type: Super-heavy walker
Structure Points: 3
Armour (Front/side/rear): 13/13/10
Ballistic Skill: 3
Weapon Skill: 2
Attacks: 3 at Strength 10 (2D6 armour penetration) with no armour saves allowed OR stomp attack (1 attack at each model in contact with it during assault phase resolved at WS and I 1. S10 power weapon, 2D6 penetration)

Weapons:
- Turret Mounted Demolisher cannon (R:24", S:10, AP:2, Ordnance 1, Barrage)
- 2x chin mounted twin Rail rifles (R:36", S:6, AP:3, Heavy 2, twin-linked)
- Two crushing claws (-1A per claw destroyed)

Fleet walker (6” + D6” + 6” assault)


I made the rules this way so that it is a resilient unit that is not too outright killy. I wanted it to be tough but not as over the top as some of the apocalypse units. At first I thought twin linked rail rifles might be too much, then I saw the Brass Scorpion has a Heavy 10 S6 AP3 gun, 2 heavy flamers, a demolisher cannon, more attacks and goes nuclear more easily, all for 50 points less.

Overall, it was a very solid unit in the game but didn't dominate overly or unbalance things. More on that later.

Stay tuned for the real battle report when i get the photos from OSH and get a chance to write everything up.